First, choose whether to apply a Video Filter or Video Transition .
Filters affect only the selected frames or generated frames. The filters provide effects which range from do nothing, monochrome conversion to various mirroring and swapping effects.
Transitions take two sets of frames as input (referred to as A and B frames) and provide functionality to merge them together in some way. The transitions provide a small collection of fade and wipe functionality.
A few notes on transitions are in order here. By default, a transition affects those frames selected by combining them with those immediately following--so if you want to cross fade the last second of a scene (A) with the first second of the following scene (B), choose Overwrite , click scene A in the Storyboard , check Limit to , click Video Transition , and make sure Frames Following is selected.
The direction of the transition can be set to Reverse , but each effect determines what that means. It becomes apparent when selecting a fade in combination with a colour (fade to/from black, white, pink etc) or a wipe.
![[Tip]](images/tip.png) |
Tip |
|---|---|
For most transitions you should also choose -> . |
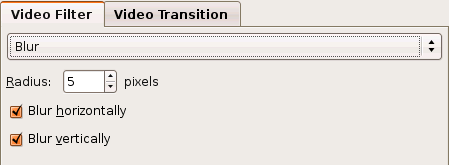
The Blur filter makes the image appear to be out-of-focus. It performs a convolution using a triangle distribution.
Radius controls the amount of blur. Radius refers to the number of neighboring pixels that gets blended into each pixel.
Enable Blur horizontally to blend each pixel with the left and right neighboring pixels.
Enable Blur vertically to blend each pixel with the neighbors above and below.
Example :

|
Motion Blur |
|---|---|
Emulate a motion blur effect by enabling only one of Blur horizontally or Blur vertically and using a fairly large Radius (try 20). |
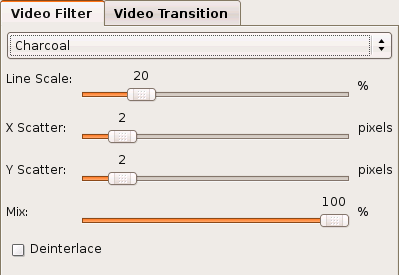
The Charcoal filter makes the image appear to be hand-drawn using a charcoal pencil.
Line Scale controls the overall amount of charcoal or blackness.
X Scatter controls the heaviness of the lines in the horizontal direction.
Y Scatter controls the heaviness of the lines in the vertical direction.
Mix controls how much of the charcoal image is blended with the original image. 0% does not blend any of the charcoal and 100% uses the charcoal image exclusively.
Enable Deinterlace if the image has much inter-field motion ( Section 2.15, “Inter-field Motion” ). The interlace artifacts can adversely affect the effect. However, applying this reduces the resolution by half since it isolates one field and doubles the lines ( Section 2.9, “Interlace and Fields” ).
Example :

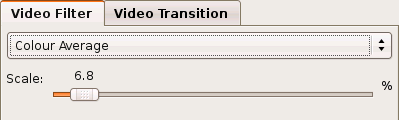
The Colour Average filter creates a posterize effect.
Scale creates fewer colour regions thereby increasing the level of the effect.
Example :

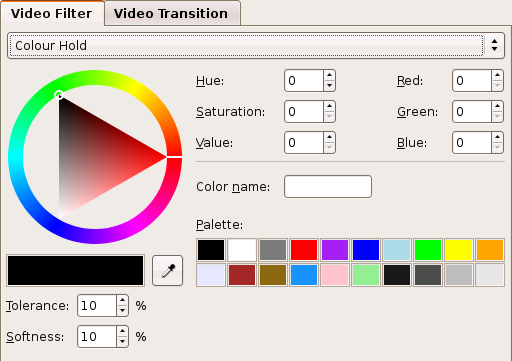
The Colour Hold filter makes an image grayscale except for a particular colour.
-
Use the embedded colour picker to set the colour to retain.
![[Note]](images/note.png)
Note To use the eyedropper tool, you should first set Tolerance to 100% to expose all of the colours in the original image.
Tolerance controls how many colours near the chosen colour are also displayed. It is a good idea to have at least a little tolerance.
Softness also effects how many colours near the chosen colour are also displayed.
Example:
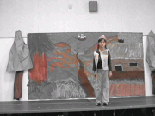
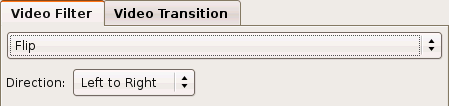
The Flip filter alters the direction of the image as if you were looking at the image in a mirror. When Direction is Left to Right , it performs a horizontal flip--what appeared on the left, now appears on the right and vice versa. When Direction is set to Top to Bottom it performs a vertical flip, which can make the image appear upside down (or right side up if you are correcting an upside image).
Example :
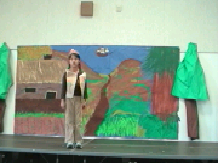
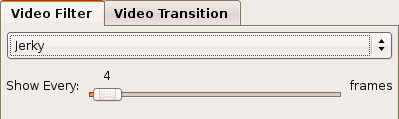
The Jerky filter repeats some frames and drops the others to keep the duration the same, unlike the Speed option (Section 9.1, “Selection of Frames”). As a result, the playback appears choppy. As this is actually a temporal effect, not affecting the image, there is no example available. The Show Every option determines how many frames are dropped between each frame that gets repeated.
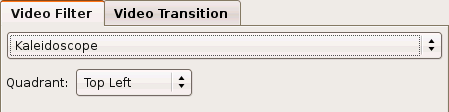
The Kaleidoscope filter repeats a quadrant of the image with mirror effects to make it appear as if viewed through a kaleidoscope toy.
Quadrant controls which quadrant of the original image gets repeated: Top Left, Top Right, Bottom Left, Bottom Right.
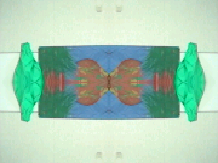
Example:
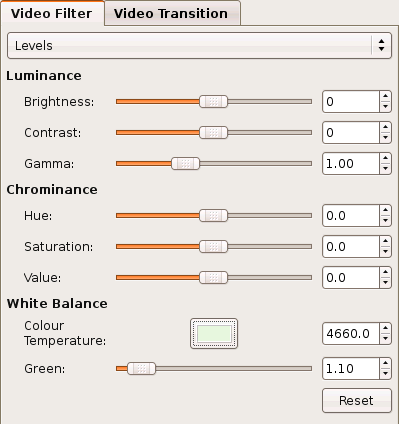
The Levels filter adjusts various light (Luminance) and colour (Chrominance) attributes of the image including colour correction (White Balance). This filter supports keyframing ( the section called “Keyframing” ).
Brightness adjusts the level of light in a linear manner. It simple adjusts the Y component of the native DV Y'CbCr color space.
Contrast adjusts the difference between the color and brightness.
Gamma adjusts the brightness in a nonlinear manner such that dark area brighten more so than lighter areas.
Hue rotates the colors around the colour wheel .
Saturation adjusts the amount of perceived colour. You can enhance the colour vibrancy by increasing this or make the image appear more washed out by reducing it.
Value adjusts the brightness in a linear manner. It is very similar to Brightness , but does it within a different colour space that can yield subtly different results.
Colour Temperature is a white balance tool for colour correction. Basically, this can compensate for a camera that is not correctly perceiving white as white, perhaps due to fluorescent lighting. Also see the Wikipedia topic.
Green Tint is a colour correction tool that complements the Colour Temperature control, which just affects the red and blue components. Also see the Digikam documentation .
|
White Balance |
|---|---|
The easiest way to use white balance controls is to click the colour button to open the colour picker dialog. Then, move the colour picker dialog to the side of the preview window. Then, click the eyedropper button on the colour picker dialog. Next, click an area of the FX preview that should be white. Finally, click OK to close the dialog window. If you need to redo this operation, then you should first click Reset . |
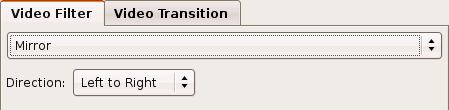
The Mirror filter creates the illusion of a mirror placed in the middle of the image. It splits the image in half and places a mirror image of the first half onto the second half.
The Direction option lets you choose which half to keep and with which to make the mirror image copy. For example, Left to Right retains the left half and place the mirror image of the left half on the right half of the image.
Example :

The Pan and Zoom filter performs affine transformations to change the size and position of the image. While you can not alter the output size of the video, you can zoom in the image with automatic cropping. Also, depending upon your settings, the image will stretch or shrink to fill the output without padding. This filter support keyframing ( the section called “Keyframing” ).
-
Pan controls the position of the center of the image.
X controls the horizontal position as a percentage of the original image width. 0% represents the left edge while 100% represents the right edge.
Y controls the vertical position as a percentage of the original image height. 0% represents the top edge and 100% the bottom edge.
-
Zoom controls the scaling and cropping.
Width controls the width as a percentage of the original width that you want to retain. 1% retains the smallest width or is totally zoomed in. 100% represents the entire width of the original image or no horizontal scaling.
Height controls the height as a percentage of the original height that you want to retain. 1% retains the smallest amount or is totally zoomed in. 100% represents the entire height of the original image or no vertical scaling.
Reverse only applies when using keyframes and inverts the settings over time.
Deinterlace performs a simple line-doubler deinterlace prior to the transformation in order to isolate a field ( Section 2.9, “Interlace and Fields” ) and prevent artifacts due to inter-field motion ( Section 2.15, “Inter-field Motion” ).
Example:
Compare it to the original: Chapter 9, FX
The Pixelate filter makes the image appear blocky.
Initial Size and Final Size lets you controls the amount of blockiness over time. You can individually control the block Width and Height in terms of pixels. Because DV pixels are not square you may need different width and height values to make it appear square.
Example :
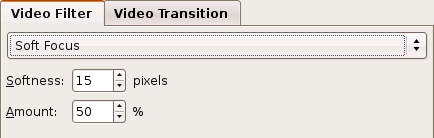
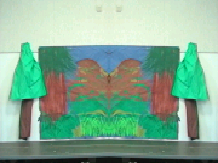
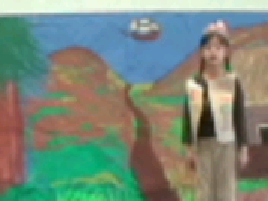
The Soft Focus filter performs a large blur and mixes it with the original, unmodified image to give the image a soft look as if were shot with a soft focus lens .
Softness controls the amount of blurring as a radius around each pixel.
Amount controls the amount the blurred image is mixed with the original image. The higher the percentage, more of the blurred image is mixed with less of the original.
Example:


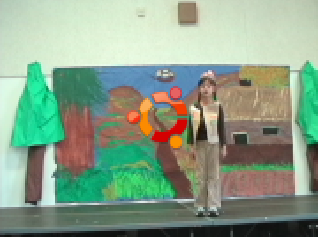
The Superimpose filter composites or overlays a still image or sequence of still images over the video. It supports full per-pixel alpha-blending if the still image contains an alpha channel (PNG, TGA, and SVG are examples of image formats that support alpha channels). Also, you can animate the position and opacity of the image.
Example :
-
Enter the complete file name of the image to the image or image sequence. The filter supports many image file formats because it uses GDK's pixbuf library, which has plugin system. Most systems have built-in support for the popular formats of PNG, JPEG, GIF, and BMP. You can find out what your system supports by running gdk-pixbuf-query-loaders in a terminal window. See the gdk-pixbuf documentation for more information.
Note To import a file sequence, you must enter a format string containing pattern-matching macros. See the printf or scanf man pages for more information. A pattern of "%6d" would match a number containing up to 6 digits. A pattern of "%d" would match a number with any number of digits, and a pattern of "%06d" would match a number contain exactly 6 digits, padding with zero where needed.
Use Zoom to adjust the size of the overlay as a percentage of the original overlay size. It only supports 1% to 200%, so you might need to adjust it in an external tool if it is extremely large.
Enable Interlaced? Use field-based rendering? if you are animating the position and intend to keep the final output as interlaced. Field-based rendering makes the motion more fluid on an interlaced display by rendering to each field instead of each frame. When you view an individual frame, you are seeing two fields interleaved. Therefore, the image will appear to have fringed edges because each field appears at a different time, and the position can be different at different points in time.
-
Position and Animation lets you control the location of the overlay either fixed or a single vector of motion over the duration of the effect.
X Offset adjusts the horizontal position relative to the positions described below. You can enter a positive or negative number of pixels.
Y Offset adjusts the vertical position of the overlay relative to the position described below. You can enter a positive or negative number of pixels.
-
Initial Position sets the beginning position of the motion.
Left positions the left edge of the overlay along the left edge of the video.
Center centers the overlay horizontally.
Right positions the right edge of the overlay along the right edge of the video.
Left Off positions the overlay completely off of the left edge of the video.
Right Off positions the overlay completely off of the right edge of the video.
Top positions the top edge of the overlay along the top edge of the video.
Middle vertically centers the overlay within the video.
Bottom positions the bottom edge of the overlay along the bottom edge of the video.
Top Off positions the overlay completely off of the top edge of the video.
Bottom Off positions the overlay completely off of the bottom edge of the video.
Final Position sets the ending position of the motion.
Fade In lets you specify how long it takes to animate the translucency from transparent to fully opaque. A value of 0 disables this option and makes the overlay opaque at the beginning of the effect.
Fade Out lets you specify how long it takes at the end of the effect to alter the translucency from opaque to transparent. A value of 0 disables this option and leaves the overlay opaque.
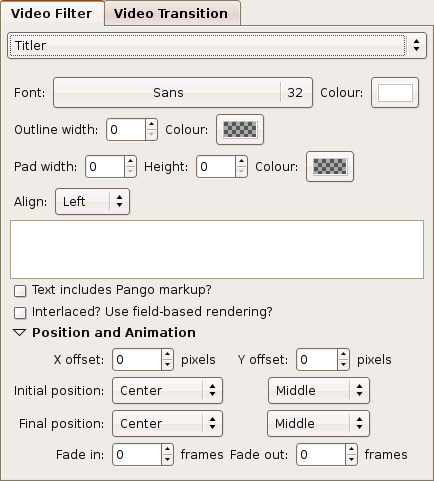
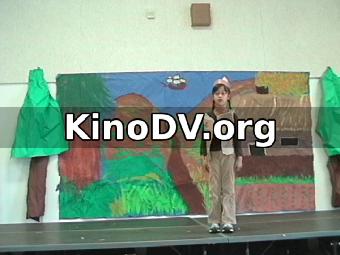
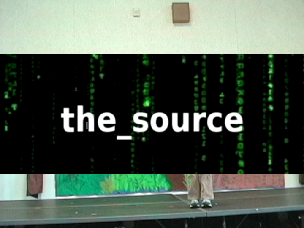
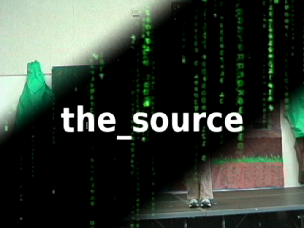
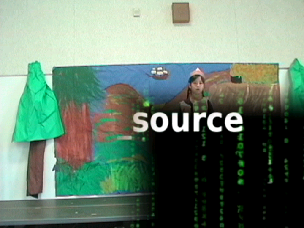
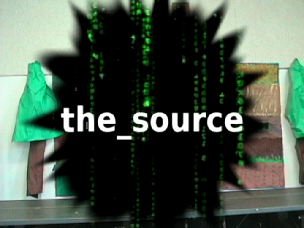
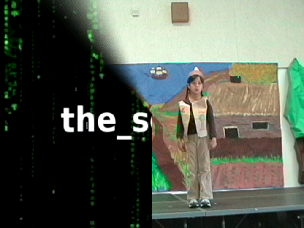
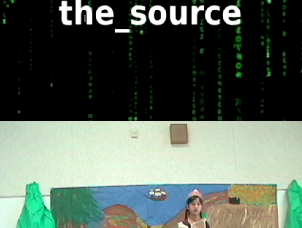
The Titler filter composites text over the video image. It supports internationalization and per-pixel alpha-blending of the anti-aliased font edges.
Example :
Click Font to change the typeface and size.
Click Colour to set the text foreground colour and opacity.
Set the Outline Width to set the number of pixels, up to 3, of outline colour to apply to the text. Click Colour next to Outline Width to set the colour and opacity of the text outline.
Pad Width , Height , and Colour adjusts the background colour and how far it extends beyond the rectangular box surrounding the text.
Align controls the alignment of multiple lines of text with respect to one another, not with respect to the video image--see below for that.
Enable Text includes Pango markup? to include Pango markup tags . If you enable this, then you must use entities to include special characters: < (<), > (>), & (&).
Enable Interlaced? Use field-based rendering? if you are animating the position and intend to keep the final output as interlaced. Field-based rendering makes the motion more fluid on an interlaced display by rendering to each field instead of each frame. When you view an individual frame, you are seeing two fields interleaved. Therefore, the image will appear to have fringed edges because each field appears at a different time, and the position can be different at different points in time.
-
Position and Animation lets you control the location of the title either as fixed or as a single vector of motion over the duration of the effect.
X Offset adjusts the horizontal position relative to the positions described below. You can enter a positive or negative number of pixels.
Y Offset adjusts the vertical position of the title relative to the position described below. You can enter a positive or negative number of pixels.
-
Initial Position sets the beginning position of the motion.
Left positions the left edge of the title along the left edge of the video.
Center centers the title horizontally.
Right positions the right edge of the title along the right edge of the video.
Left Off positions the title completely off of the left edge of the video.
Right Off positions the title completely off of the right edge of the video.
Top positions the top edge of the title along the top edge of the video.
Middle vertically centers the title within the video.
Bottom positions the bottom edge of the title along the bottom edge of the video.
Top Off positions the title completely off of the top edge of the video.
Bottom Off positions the title completely off of the bottom edge of the video.
Final Position sets the ending position of the motion.
Fade In lets you specify how long it takes to animate the translucency from transparent to fully opaque. A value of 0 disables this option and makes the title opaque at the beginning of the effect.
Fade Out lets you specify how long it takes at the end of the effect to alter the translucency from opaque to transparent. A value of 0 disables this option and leaves the title opaque.
As of version 1.2.0, you can use special variable substitution syntax to have Kino generate a title from various metadata.
#timecode#= timecode of the frame within your movie, as seen at the bottom of the window.#dv.timecode#= The timecode the frame appears on the tape cassette, if applicable. Imported or rendered DV usually has a timecode relative to the beginning of the clip.#dv.datetime#= The date and time of the recording as set by the camera or software, in the case of rendered or imported video.#dv.date#= Just the date portion of dv.datetime.#dv.time#= Just the time portion of dv.datetime.#dv.filename#= The base file name of the clip.#filename#= The project file name.#meta.abstract#= The "abstract" for the clip.#meta.author#= The "author" for the clip.#meta.copyright#= The "copyright" for the clip.#meta.id#= The "id" for the clip.-
#meta.title#= The "title" for the clip.Note The
#meta.items are entered into the Storyboard ( Chapter 12, Metadata ). If you use custom metadata items, the above generalizes into#meta.name ( Section 12.1, “metaNames” ).
All video transitions share a common set of controls. However, the defaults are setup for the most common usage: forward with the following frames over the full range of the effect.

The first control is the direction with Forward and Reverse options. The exact meaning is not universal; the effect interprets this, if at all. Typically, if the effect has some sort of direction or progression, then Reverse provides the opposite action of Forward . For example, if something normally moves to the left, then in reverse it moves to the right.
-
The radio buttons define the B clip in terms of an A-to-B transition:
Frames following refers to the multiple frames following the range of the effect, processed sequentially.
Frame following refers to the first frame beyond the range of the effect.
Frame preceeding refers to the frame immediately prior to the first frame in the effect.
a solid color
Start lets you set the starting point along the timeline of the "progress" of a transition effect.
End lets you set the ending point along the timeline of the "progress" of a transition effect.
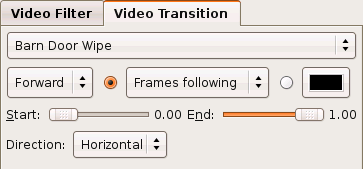
The Barn Door Wipe provides the appearance of two opposing doors opening simultaneously to reveal the B clip.
The Direction option controls the lines of symmetry.
Example : Horizontal
Example : Vertical
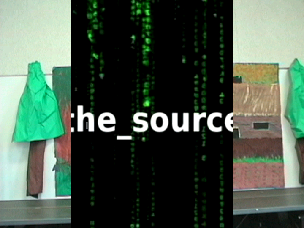
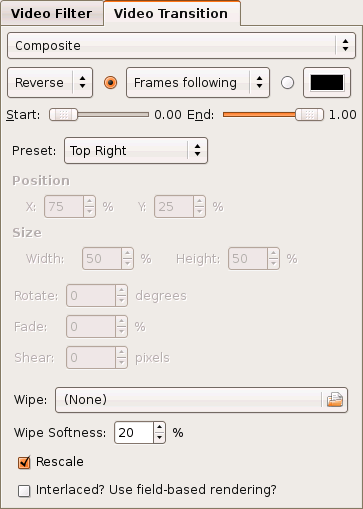
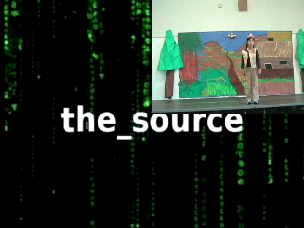
The Composite transition overlays the B clip atop the A clip. It includes affine transformation (position, scale, rotation, shear) along with opacity and the luma wipe processor ( the section called “Luma Wipe” ). Furthermore, the transition is keyframeable ( the section called “Keyframing” ), making this one very powerful effect!
Preset provides a few predefined settings with keyframes to cover common effects as well as provide ideas about using this effect.
-
Position controls the position of the center of the B clip image.
X controls the horizontal position as a percentage of the original image width. 0% represents the left edge while 100% represents the right edge.
Y controls the vertical position as a percentage of the original image height. 0% represents the top edge and 100% the bottom edge.
-
Size controls the scaling and cropping of the compositing rectangle. If Rescale is enabled the B clip is scaled to fit within the rectangle. Otherwise, the B clip is cropped within the rectangle.
Width controls the width as a percentage of the original width that you want to retain. 1% retains the smallest width or is totally zoomed in. 100% represents the entire width of the original image or no horizontal scaling.
Height controls the height as a percentage of the original height that you want to retain. 1% retains the smallest amount or is totally zoomed in. 100% represents the entire height of the original image or no vertical scaling.
Rotate sets the number of degrees of rotation to apply to the B clip.
Fade adjusts the opacity of the B clip from 0% as opaque and 100% as fully transparent.
The Shear control makes the B clip appear as though one side is shifted upward and the other side downward in a vertical stretching fashion.
Wipe animates the portion of the B clip that gets applied over time using the same effects in the Luma Wipe transition.
Wipe Softness controls the amount of blurring at the inner edges of the wipe.
Disable Rescale to crop the B clip instead of scaling it.
Enable Interlaced? Use field-based rendering? if you intend to keep the final output as interlaced. Field-based rendering makes the motion more fluid on an interlaced display by rendering to each field instead of each frame. When you view an individual frame, you are seeing two fields interleaved. Therefore, the image will appear to have fringed edges because each field appears at a different time, and the position can be different at different points in time.
Example :

The Differences transitions paints the differences or similarities between the A and B frames as a certain colour.
Sensitivity adjusts how similar or different the colors of each pixel are relative to each other.
For Operation , choose whether to highlight the Differences or Similarities
Use Colour to set the highlight colour.
Example :
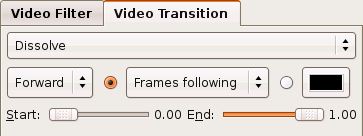
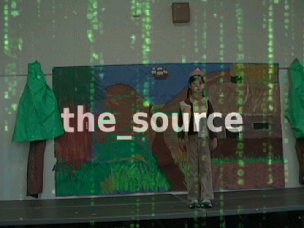
The Dissolve transition fades out clip A while clip B fades in. It is the video analog of an audio crossfade.
Example :
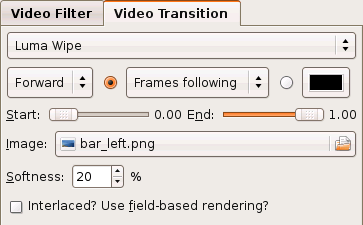
The Luma Wipe is a generic, extensible wipe processor. The luminosity of an image defines the transitional edges and progress of the wipe. It comes with a large number of wipe images for many of the standard (SMPTE) wipes. Basically, applies a threshold filter, where the threshold increases over time, to a greyscale image thereby making it into a black and white image. Where a pixel's level is below the threshold, it becomes black, and where it is above the threshold, it becomes white. Then, the B clip appears where there are black pixels in the filtered luma, and the A clip appears where there are white pixels in the filtered luma.
Click Image to choose a greyscale image that defines the wipe effect. A whole bunch of wipes are included with Kino, and it is easy to create your own.
Softness controls the amount of blurring along the edges between the A and B clip images.
Enable Interlaced? Use field-based rendering? if you intend to keep the final output as interlaced. Field-based rendering makes the motion more fluid on an interlaced display by rendering to each field instead of each frame. When you view an individual frame, you are seeing two fields interleaved. Therefore, the image will appear to have fringed edges because each field appears at a different time, and the position can be different at different points in time.
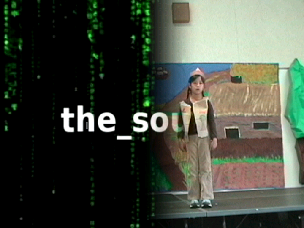
The examples below show one variation of each class of wipe.
Example : Bar
Example : Barn Door
Example : Box
Example : Burst
Example : Clock
Example : Iris

Example : Matrix


The Push Wipe transition makes it appear as though the B clip is pushing the A clip off an edge of the video.
Direction controls the direction of the push. Use the common transition Reverse option to choose the alternate direction.
Left to Right pushes the A clip off of the left edge. In conjunction with Reverse , B pushes A off of the right edge.
Top to Bottom pushes the A clip off of the bottom edge. In conjunction with Reverse , B pushes A off of the top edge.
Example : Horizontal

Example : Vertical
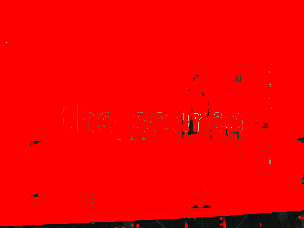
The Blue Chroma Key transition makes all the pixels in clip A whose color is near fully saturated blue transparent exposing the B clip beneath.
Some video effects support keyframing--the ability to adjust parameters of the effect over time with key frames and interpolation . The key frame button is located to the right side of the scrub bar beside the Render button. If an effect supports key frames, then the key frame button is enabled as seen in the picture below.
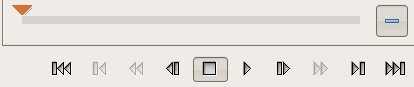
Click the key frame button to add (+) or remove (-) a key frame.
|
Note |
|---|---|
It is not possible to remove the first key frame. |
When you add a key frame, you can manually set the parameters on that frame. Then, the effect interpolates the values between your key frames. Most effects perform linear interpolation of their numeric parameters; however, the Levels video filter ( the section called “Levels” ) uses piecewise constant interpolation.

The transport control buttons that normally move between the previous and next scenes positions the preview to the respective key frame. Between key frames, the effect disables all widgets that are being controlled by interpolation. Then, when you move to a key frame, the effect enables the widgets for tweaking.