

The Menu
The menu allows you to customize KPresenter.
The items in this submenu can be toggled, that is, you can both enable and disable the display of specific toolbars here.
FIXME: Find out what this is
Autocorrection is KPresenter's ability to correct
common typing errors or expand abbreviations independently of the spell
checking function. There are several common typing errors entered for
you by default such as replacing teh with
the and you can add as many more as you
like.
The ability to expand abbreviations can save you a lot of typing time, if you often repeat text whether in the same presentation or in multiple presentations.
For instance, if you work for «Company with a really really
long name Inc.» then you might define an autocorrection entry so
that whenever you type myJob or some other piece
of unique text, it will be replaced with «Company with a really
really long name Inc.».
Autocorrection can be applied automatically as you type, or only on demand when you choose it from the menu.
allows you to assign a keyboard shortcut to actions that KPresenter menus or icons contain.
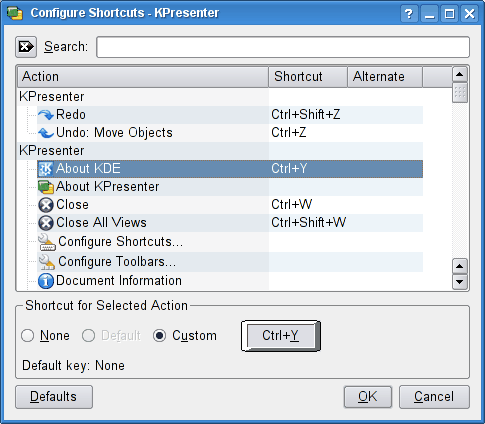
If you try to assign a shortcut that is already used, it will give you a warning message. Highlight what you want to do (in the picture, I have chosen to make a keyboard shortcut to About KDE).
Click the radio button to the Custom Key setting and type the key you want to use. I assigned Control key and Y to bring up the «About KDE» dialog box.
The button shows what has been assigned. Click to make the changes, click to restore whatever was assigned as default, click to do nothing and leave the dialog.
Configure Toolbars allows you to add or delete icons on each of the toolbars.
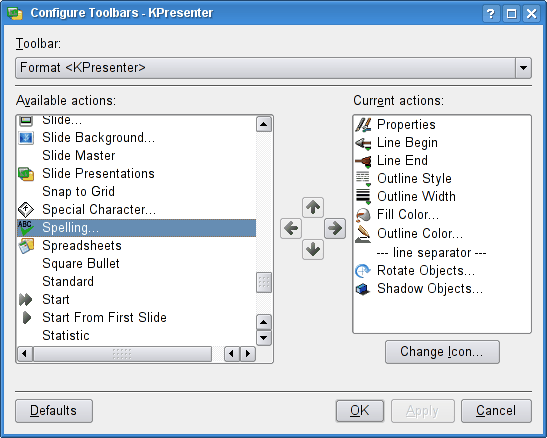 |
At the top is a Drop Down box to enable you to choose which toolbar you want to modify. In the picture Koffice Shell is selected. If I want to add the About KDE icon to that toolbar, I click the entry in the left window. The arrow pointing right becomes available, if I click the arrow the About KDE entry is added to the selected toolbar. the left arrow is available when you click in the right side window. It allows you to remove an icon from a toolbar. The up and down arrows become active when items on both sides are selected. You can move the highlight in the right side window up and down with the keyboard arrow keys or by clicking on the arrows with the mouse. The Configure Kpresenter menu entry gives two menu boxes.
 |
The Interface icon on the left allows us to adjust the time settings on the autosave feature. The bottom two sliders allow the Raster settings to be adjusted. This still needs a little more work. They control the minimum size of objects (such as boxes) drawn on screen. You may find that you cannot make a box smaller than a certain size.
The second icon is labelled Color
 |
It changes the background color of the text box as you type text in (in the picture, I have made it green. There is a color choice dialog box). The Text boxes are white by default. If you had a dark background color and you wanted to put some white text over it, you could color the text box so that you could see what you were typing. When you have finished, the area around the text would revert to whatever the background color was. The button restores the original settings.